
3D Printer First Layer Not Sticking? 7 Things to Check
When a first layer stops sticking, the usual reaction is to start changing everything at once: nozzle temperature, bed temperature, Z offset, flow, speed, glue, slicer profiles. That normally makes the problem harder to find.
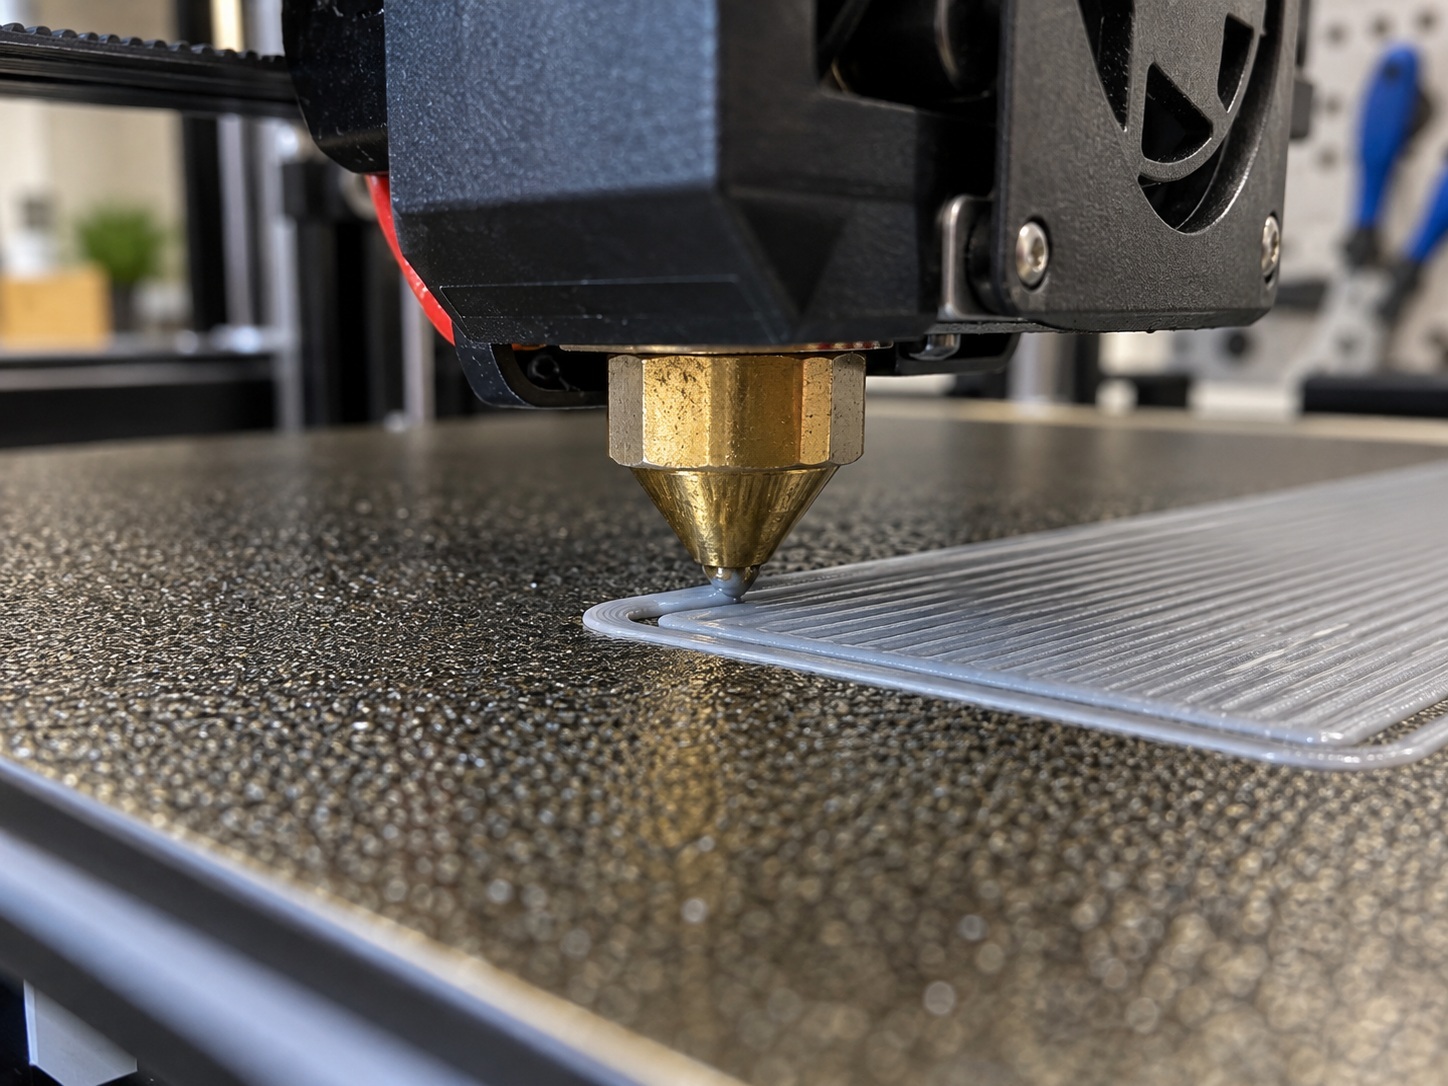
A first-layer problem is usually much easier to diagnose if you work through it in the right order. Start with the things that fail most often, make one change at a time, and only move into hardware troubleshooting after the basics have been ruled out.
Here are the seven things we would check first.
1. Clean the build plate properly
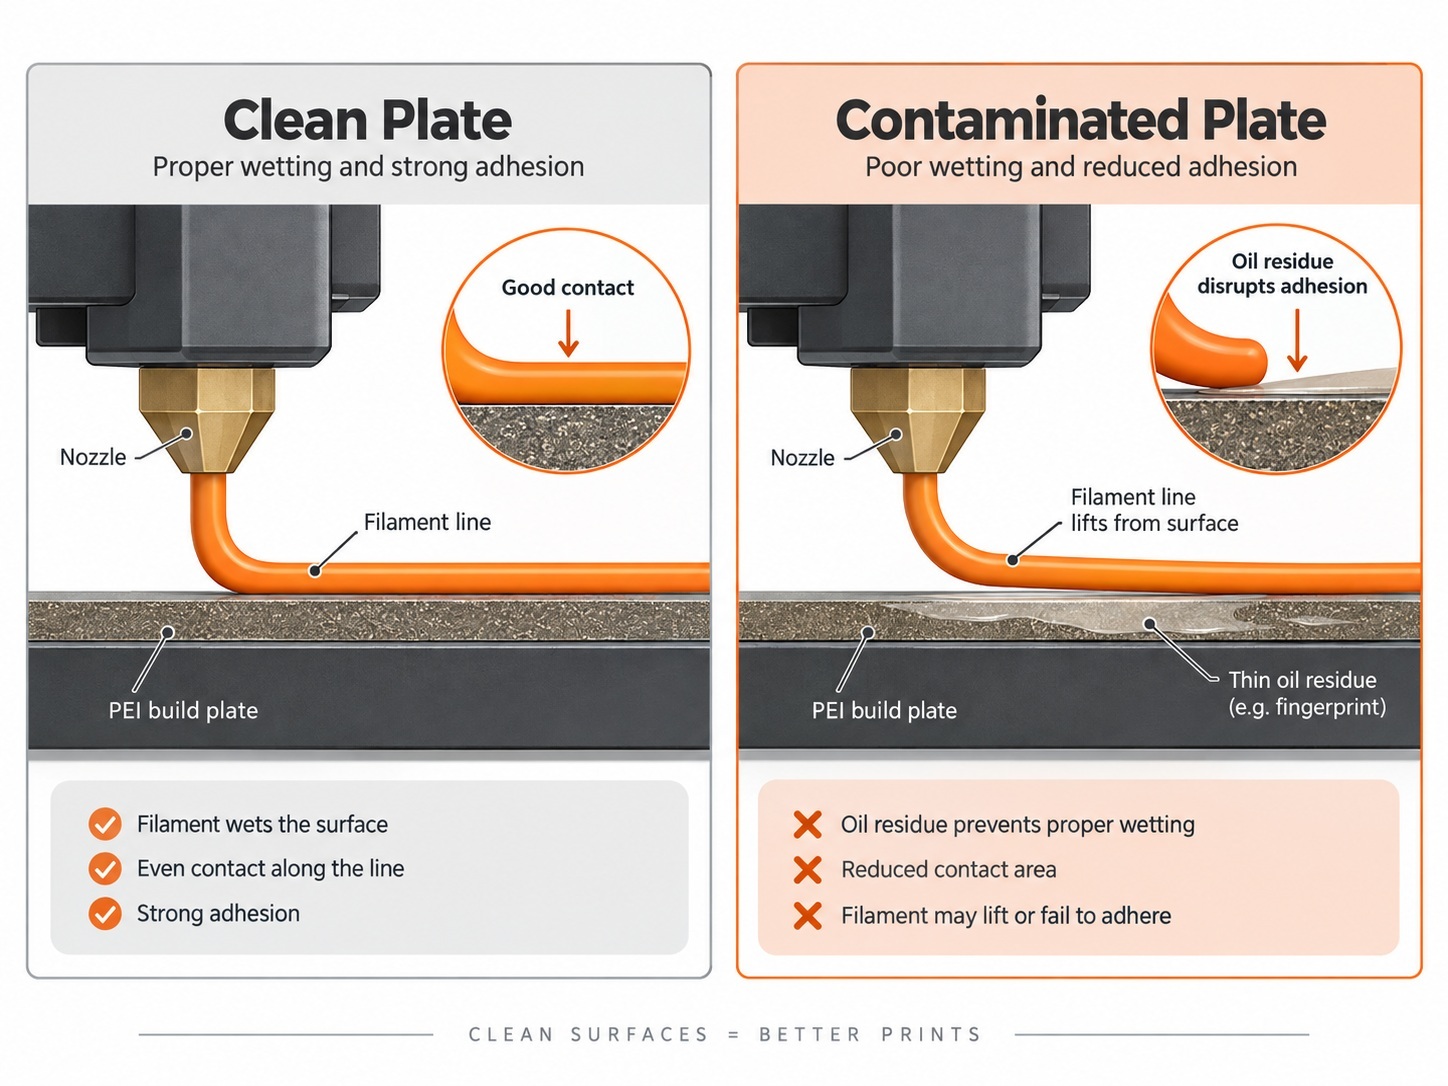
If a printer was working yesterday and suddenly will not hold a first layer today, start with the build surface.
Fingerprints are enough to cause trouble. Skin oils can leave areas that look perfectly clean but do not wet properly when molten plastic is laid over them. This is especially noticeable on large flat first layers, where one contaminated patch can become the starting point for a corner to lift.
For most PEI build plates, a good reset is simple:
- Remove the plate from the printer.
- Wash it with warm water and a small amount of plain dish soap.
- Rinse it thoroughly.
- Dry it with a clean paper towel or lint-free cloth.
- Once it is clean, handle it by the edges.
Isopropyl alcohol is useful for routine wipe-downs, but it is not always a substitute for washing the plate when oils and residue have built up.
Be careful with stronger solvents. Different PEI sheets and coatings have different cleaning requirements, and acetone should not be treated as a universal PEI cleaner. In particular, manufacturers commonly warn against acetone on textured PEI surfaces.
If the surface itself is damaged or simply worn out, cleaning will not restore it forever. Spool3D carries replacement 3D printer build plates and print-bed components for a wide range of machines.
2. Make sure the printer is using the correct build-plate profile
Modern printers can compensate for a lot, but they still need to know what surface is installed.
A smooth PEI plate, textured PEI plate and specialty adhesion plate can have different thicknesses, surface textures and temperature recommendations. If your printer or slicer has a build-plate selection, make sure it matches what is physically on the machine.
This becomes especially important if the problem began immediately after changing plates. A printer that was calibrated for one sheet may not place the nozzle correctly on another, depending on how that machine measures the bed.
Also make sure the removable plate is actually sitting flat. A small piece of filament, plastic debris or other contamination trapped underneath a spring-steel sheet can create a local high spot that bed meshing cannot always hide gracefully.
3. Look at the first layer instead of trusting the Z-offset number
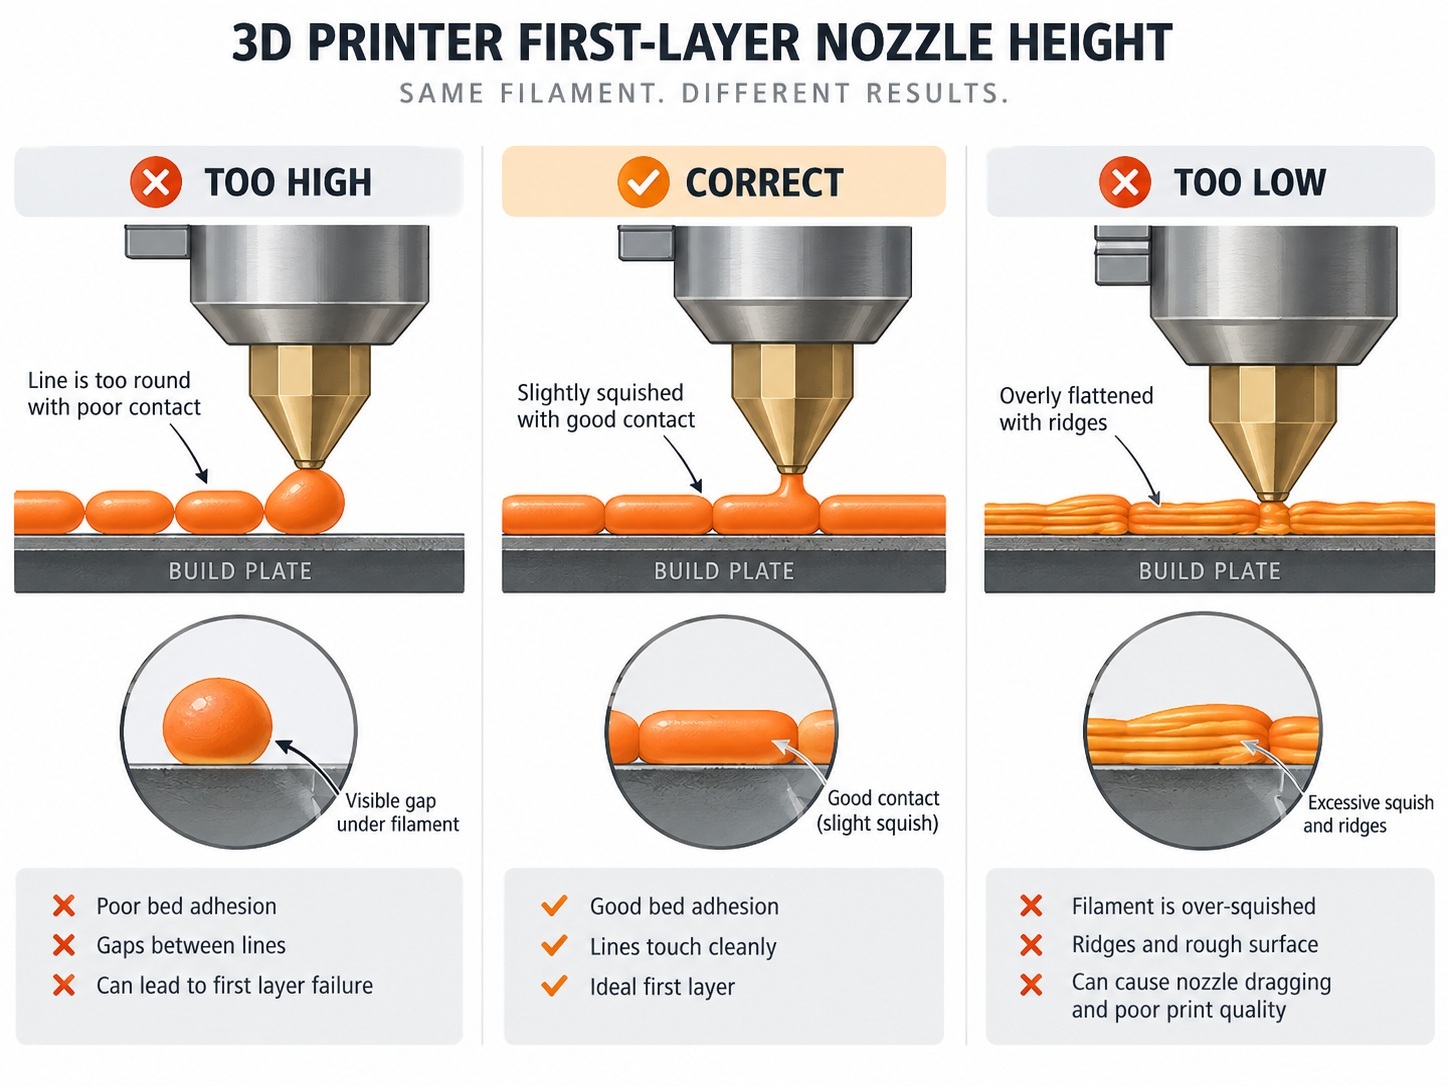
The correct nozzle height is a physical result, not a magic Z-offset number.
If the nozzle is too high, the filament tends to look round. Adjacent lines may have visible gaps between them, and the extrusion can follow the nozzle around instead of staying attached to the plate.
If the nozzle is too low, the filament gets excessively flattened. You may see ridges pushed up between neighbouring lines, a rough first-layer surface, or areas where so little material can escape that the extrusion becomes inconsistent.
A good first layer is slightly compressed into the surface, with neighbouring lines touching cleanly without deep ridges between them.
Many newer printers determine first-layer height automatically using load cells, strain gauges or other probing systems, so there may be little or no manual Z-offset adjustment in normal use. That does not mean first-layer height can never be part of the problem. If a printer that normally produces excellent first layers suddenly does not, run the manufacturer's calibration routine before compensating with random slicer offsets.
If you have recently changed the nozzle, hotend, build plate or anything in the probing system, recalibration should move much higher on the checklist.
4. Give the bed time to become thermally stable
The printer display showing 60°C does not necessarily mean the entire build plate, magnetic sheet, print surface and surrounding structure are all at the same temperature yet.
The thermistor only measures temperature at its sensor location. Larger and thicker beds can continue changing shape and distributing heat after the target temperature first appears on the display.
This matters most on large printers, thick aluminum beds and machines where the bed shape changes noticeably as it heats. It also matters more as print-bed temperatures increase.
If you can get a good first layer in one part of the bed but not another, or your mesh seems to change between a cold printer and a hot printer, thermal stabilization should be on your list.
We covered this in more detail in Why You're Actually Failing Your First Layer: The Case for Heat Soaking Your 3D Printer.
For a long or important print, it can be worth letting the bed stabilize before running the final bed mesh or starting the job rather than beginning the instant the display reaches target temperature.
5. Put first-layer speed, temperature and flow back to something reasonable
If the surface is clean and the nozzle height looks right, then move into slicer settings.
The first layer has one job before anything else matters: stay attached.
If you have been experimenting with aggressive speed settings, custom filament profiles or high-flow tuning, temporarily return to a known-good manufacturer or generic material profile. This is much faster than trying to tune five modified settings against each other.
Pay attention to:
- First-layer speed: slowing the first layer gives the material more time to contact the build surface.
- Nozzle temperature: material that is being extruded too cold may not flow or wet the surface consistently.
- Bed temperature: use the range appropriate for the filament and the specific build surface.
- First-layer flow: excessive compensation can hide a height problem; too little flow can leave poor contact between lines.
Do not assume that hotter is always better. Increasing the bed or nozzle temperature indefinitely can create a different set of problems. Start from the filament and printer manufacturer's recommendations, then adjust from there.
For Spool3D materials, our 3D printing temperature guide is a useful starting point.
6. Check the filament before blaming the printer
Filament condition is not the first thing we would blame for every first-layer problem, but it belongs on the list.
Moist filament can extrude inconsistently. Depending on the material and how much water it has absorbed, you may hear popping or crackling, see small bubbles, get a rough extrusion, or notice that the deposited line changes width.
That makes an already marginal first layer even harder to keep attached.
PETG, nylon, TPU and many engineering materials can make moisture problems particularly obvious, but PLA is not immune to poor storage either.
If the spool has been sitting exposed for a long time and extrusion looks inconsistent, use the correct drying procedure for that specific material rather than trying to compensate with Z offset or extra glue.
7. If none of that worked, start looking for a mechanical problem
This is where troubleshooting becomes printer-specific.
Check the simple mechanical items first:
- Is the build plate seated correctly?
- Is there debris underneath it?
- Is the nozzle loose, damaged or partially clogged?
- Is the hotend secure in the toolhead?
- Is filament feeding smoothly through the extruder?
- Is the bed or gantry loose?
- Did the issue start immediately after a nozzle, hotend or extruder repair?
A partial nozzle restriction can be especially deceptive. The printer may still extrude filament, but not consistently enough to create an even first layer. If extrusion looks thin or changes width even when the toolhead is travelling at a constant speed, inspect the filament path and nozzle rather than continuing to lower the Z offset.
Replacement 3D printer nozzles are available in many printer-specific sizes and materials, but a nozzle should not be replaced simply because the first layer failed once. Diagnose the cause first.
If the machine has automatic bed probing and the first-layer height changes unpredictably from one print to another, run the printer's calibration or self-test procedures and inspect the probing system according to the manufacturer's instructions.
What about glue?
Glue can be useful. It just should not be the automatic answer to every adhesion problem.
On some surface-and-material combinations, an adhesive is genuinely helpful. On others, glue is used as a release layer to keep a material from bonding too aggressively to the build surface. And with some modern plates and common materials such as PLA, a clean plate with the correct first-layer height may need no added adhesive at all.
If a print suddenly stopped sticking to a plate that worked perfectly without glue last week, find out what changed before coating the plate.
For materials and surfaces that do benefit from additional adhesion, Spool3D carries products such as Nano Polymer Adhesive. Follow the build-plate and filament manufacturer's recommendations for your particular combination.
The order matters
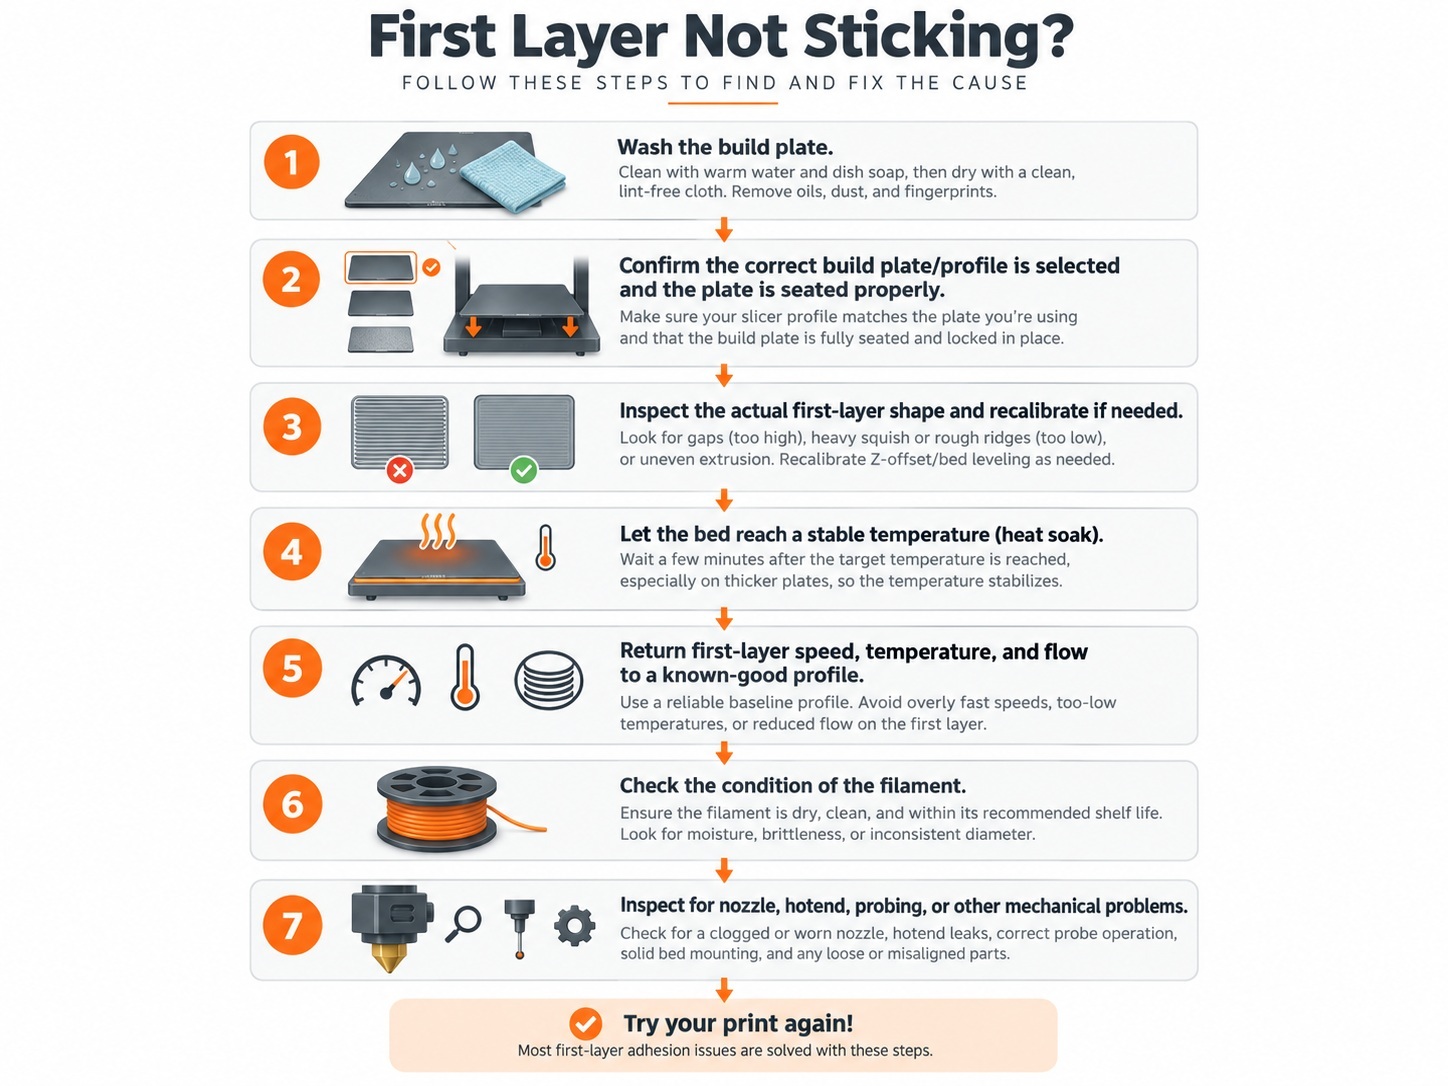
If your first layer is not sticking, this is the order we would use:
- Wash the build plate.
- Confirm the correct plate/profile is selected and seated properly.
- Inspect the actual first-layer shape and recalibrate if necessary.
- Let the bed reach a stable temperature.
- Return first-layer speed, temperature and flow to a known-good profile.
- Check the condition of the filament.
- Only then move into nozzle, hotend, probing and mechanical troubleshooting.
Most importantly, change one thing at a time. If you wash the plate, lower the Z offset, raise the nozzle temperature, slow the print and add glue all at once, you may get the print to stick — but you still will not know what fixed it.
That becomes a problem the next time it happens.
If you have worked through the basics and the printer still cannot produce a consistent first layer, Spool3D offers 3D printer repair service in Calgary for Bambu Lab and other supported 3D printers.
Recent Posts
-
3D Prints Splitting Between Layers? Causes & Fixes for Weak Layer Adhesion
A 3D print can have a smooth surface, tidy corners and a clean top layer, then split the first time …October 08, 2026 -
3D Printer Under-Extrusion: Causes, Fixes & Troubleshooting
Under-extrusion happens when your 3D printer deposits less plastic than the slicer expects. The res …October 06, 2026 -
3D Printer Layer Shifts: Belt Problem, Pulley Problem, Collision — or Something Else?
A layer shift can ruin an otherwise perfect print in a fraction of a second. The printer may run no …October 01, 2026